I’ve Returned (with Fermented Pickles)!

Fermenting pickles

Hello again friends! I’ve returned from my new marital bliss and have been trying to screw my head back on the right way ever since. My husband and I left for Costa Rica at 5AM the day after our wedding and oh. my. goodness. That place is beautiful. I won’t get into too much detail at this point, but I will say that I gained at least 8 pounds over the course of a week because of all of the delicious sweet cakes and endless cocktails. It was uh-maze-ing.

Anyway, I’m back and getting into the swing of things as best I can. I will admit, a severe case of the post-holiday blues settled over me and my husband when we returned, so we did the best thing we could do and found out how to make homemade margaritas. While delicious and fun, they’ve not been too friendly on my waistline, and I’m coming to terms with the fact that I can’t wear my favorite new skinny jeans AND have margaritas every night.

So, in hopes of getting myself back up to speed, I’ve been researching new and exciting recipes that are both paleo-friendly and exciting or new. Something that many paleo folks swear by is fermented foodstuffs. After looking around the web and realizing I’m sorely underprepared for a large feat (sauerkraut? better have an extra room where you can stow that stinky stuff) I stumbled across a super easy, low-cost way to make sour, fermented pickles. After some tweaking to suit my own tastes, I’m excited to present you all with this recipe for your very own fermented pickles!

Keep in mind, the fermenting process is completely different from setting the cucumbers in vinegar with dill and garlic. Fermented pickles will have a notable sour taste, and the saltiness depends on how concentrated your brine is.

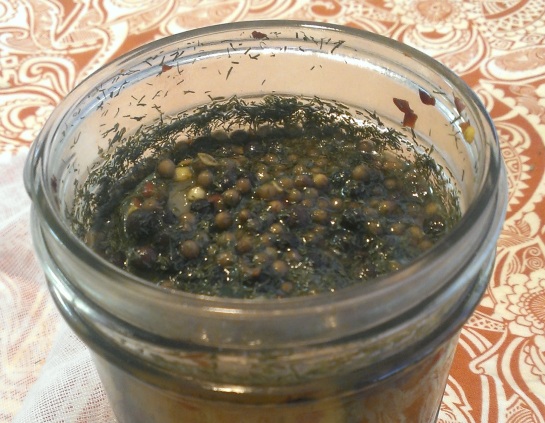
Fermented Pickles in a Jar

Prep time: 30 minutes | Wait time: 1-2 weeks | Serves: depends on who’s hungry!

Supplies needed:

  • Wide-mouthed ball jar with open, screw-on lid (32 oz.)
  • Clean cheese cloth squares, about 5”x5”

Ingredients:

  • 2 Tbsp. Kosher salt
  • 1 large, organic cucumber
  • 1 Tbsp. Coriander
  • 1 Tbsp. Allspice
  • 2 tsp. dill weed
  • 2 tsp. crushed red pepper
  • 1 Tbsp. crushed, dried bay leaves

Directions:

  1. In a sauce pan, combine 1 quart of water with the 2 Tbsp. kosher salt and bring it to a boil. Let all of the salt dissolve. Remove from heat and let cool.
  2. As the brine mixture is cooking, slice the ends off of the cucumber and toss them. Slice the cucumber into 1/4”-thick pieces and place them in the clean ball jar
  3. Add all of the spices to the jar on top of the cucumbers
  4. Cover the cucumbers with the brine mixture, making sure all of the pieces are submerged. Stir to make sure the spices are well-incorporated.
  5. Cover the mouth of the jar with the cheese cloth and tighten the ring of the lid over the top Note: don’t close it off with the top portion of the lid! The cheese cloth lets the fermenting cucumbers breathe while keeping dirt and debris out. Don’t seal it off or nothing will happen!
  6. Place the jar in a cool, dark space, somewhere where the temperature stays consistently between 68 and 75 degrees Fahrenheit.
  7. Check the pickles once a day, carefully, to make sure there isn’t any mold growing on the top. If there is, simply scrape it off with a sanitized knife an re-cover it with the cheese cloth.
  8. After about a week, cut off a piece of one of the pickles and give it a try. If it’s not as sour as you’d like, let it sit for a few days longer until you get the taste you want.
  9. When you’re satisfied with the taste, seal the pickles off with the entire lid and put them into the fridge. This will keep the wild yeast from continuing to multiply.

And voila! Homemade fermented pickles. Enjoy!

(Of course this should go without saying, but if you’re getting any really funky/nasty smells from those pickles, chances are they’re no good and you should start over with a fresh batch. A small amount of mold is normal, but do take caution before inhaling these delicious delicacies!)
The One Where I Take a Short (but sweet) Hiatus

Hello dear readers!

My oh my it’s been a while since I last updated. Things have gotten quite crazy around here in the past few weeks, and I’ve got a few more weeks of crazy before things start to settle down again and I can get back to my paleo ramblings.

Why have things been so crazy, you ask? Well, in just a few short days…

I’m getting married!

Between coordinating with vendors, answering questions for guests, figuring out last-minute details and plugging away at my day job, there’s been little time to do much more than take a quick breath and keep moving forward.

So, just so you know that I haven’t completely fallen off the face of the earth, I’m back here to say sorry for my absence, and that I’ll be gone for just a little bit longer while I get through this week and coast through my honeymoon next week.

Phew! See you all in a few weeks!

One Year Grain Free and Going Strong

Hello friends! 

I’m writing in a celebratory post for my official one-year anniversary of going grain- and sugar-free! It’s been one heck of a trip, but I can say nothing but positive things about my journey so far. After 365 days, 30 lost pounds (where did they go?!) and a renewed love of the culinary arts, I’m so happy to say I made it to this point, and I can’t wait to see what happens in during the next 365 days of grain-free living.

I made my very first post on this blog on April 26th, 2012, after deciding to jump head-first into grain-free living. My views have definitely evolved over the past year, but the learning experiences I’ve had so far have been invaluable, not to mention the connections and friendships I’ve made along the way! Read my first post here: What is a Ketogenic Lifestyle, and Why Should I Care?

And just for fun, here’s a little facial comparison from Winter 2011-2012 and now:

Photo on 2011-11-09 at 00.48

Fat n’ Happy, Winter 2011

One-Year Anniversary, Spring 2013

One-Year Anniversary, Spring 2013

Oh, and if you haven’t heard, I recently did a guest post on Paleo Lifestyle Magazine about my newest creation: thumbprint cookies with homemade sugar-free strawberry preserves. Go check it out!

Bridal Fitness: A Reconciliation With My Body (and how Paleo brought me here)

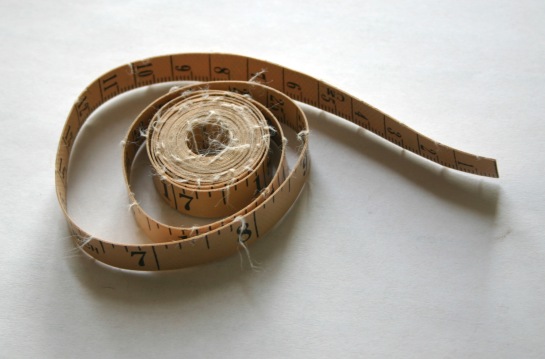
How do You Measure Up?

If you’ve been reading for a while, you may recall a post I made back in the October about trying on wedding dresses. I was notably down about it, mostly because I’d found myself in a lull between losing weight and falling off the paleo bandwagon. The first time I tried to squeeze into a dress, all I could think about was my pudgy stomach and flabby arms that stuck out like two big sore thumbs. It was a pretty disappointing thing to go through.

Two weeks later, I came back with a progress report where I’d managed to drop 6 pounds. Ah, there it was! My motivation was back! It was exhilarating!

Now, with only 35 days standing between me and my big day, I haven’t gotten down to the svelte 130 pounds I was hoping to be in my (idealistic) mind. Since that October post, I’ve managed to slowly and steadily drop 20 pounds, going from 190 to 170, and a drop in two  pant sizes.

While I may not have the kind of loss as some out there (dropping 50 pounds in three months?! for real, guys, that’s crazy), I’ve really started coming to terms with where I’m at, and I think that’s a really important part of a whole-body transformation: acceptance of yourself, your capabilities and limitations, your zones of comfort and your willingness to go beyond those zones, your physical appearance, and the inner thought processes that control your relationships with food and your environment.

There have been plenty of times in my life where I’ve taken an unhealthy approach to losing weight. In high school, I would binge, then purge, several times a day, while literally running myself ragged on the race track. In college, I took the approach of simply cutting out meals. Later on, I would drag myself to the gym 5 times a week and exhaust myself to the point of frustration and zero weight lost.

Even in my journey into eating clean, I’ve hit a few bumps in the road. Through several month-long plateaus and moments of nutritional indiscretion, I’ve continued to re-shape and re-assess my attitude about the fuel l I put in my body.

Which brings me here, to this point: I’m 5’6” and 170 pounds. Technically, still overweight, but the reason this doesn’t bother me is because the dress I bought back in December that was snug and limiting now fits me like a glove, and I feel pretty! For once, I’ve looked at myself and felt the combination of the somewhat masculine world of paleo and the feminine world of weddings collide, almost perfectly.

It’s important to always keep the big picture in mind, is what I’m really trying to say. I’ve had my fair share of moments with paleo where I want to grab the scale and throw it out the window, shake my stubborn belly and yell at it until it shrinks into itself. But then I stop, take a step back, and think about how much growing into the paleo life has helped me. A year ago, I was nearly lost without hope of ever finding a way to control my expanding waistline. My hormones were out-of-whack, my emotions went up and down consistently, I wasn’t close to Josh in the ways I desperately wanted to be, and I’d basically given up on finding a solution to any of these problems.

Which brings me to yet another exciting point: on the 25th of April, I’ll be celebrating my one-year anniversary of going grain- and sugar- free. Assuming I don’t lose another pound until then, I’ll have lost over 30 pounds total as a result of my change. Beyond straight weight loss, I’ll be proud to say that my bodily systems have successfully re-programmed themselves (hormonal, digestive, emotional, etc.) and I’m at one of my highest fitness peaks since high school.

I’ve still got a ways to go, but I couldn’t ask for a more enjoyable or educational journey to take part in.

So for now dear readers, keep calm and paleo on! 

Hooray for Bacon!

Hooray for Bacon!

Flourless Chocolate Torte

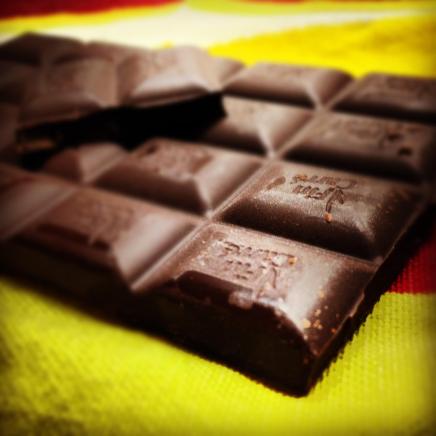
Chocolate

So, funny story about this recipe.

This was back in late July of 2012—Josh and I were up near Woodland Park, Colorado, visiting with his father who had just flown in from out of town, and his brother, who is watching the family property until their dad retires this summer. With his dad came his Grandma, Ruth, and his eldest brother, Jason.

Josh and I had just recently made the switch from Keto to Paleo, and I was dying to try my hand at a few chocolatey recipes to cure a particularly nasty bout of cravings. Being relatively new to the idea of alternative flours, I didn’t want to mess around too much with cookies or brownies or pies, lest I bake a disaster and embarrass myself in front of my soon-to-be in-laws.

Before we moved to Colorado, there was a little Italian deli in Minneapolis that we liked to visit on occasion and, before ever going keto/paleo, a rich, delicious chocolate torte that we liked to share every time we went. In the spirit of this little deli, I did some searching and found a few flourless torte recipes to give me a little inspiration.

Without considering the fact that half of the family originated from the deep south, I set out with my baker’s chocolate and a got to work. As I started cooking, people from around the house came sniffing into the kitchen with big eyes. “What are you making? That chocolate smells so good!” I was pretty excited at this point, and couldn’t wait to share it with everyone as an after-dinner treat.

Fast-forward to dessert time. Anxious, I topped the torte with cinnamon and some extra powdered cocoa and cut it into small slices for everyone to try. Josh and his brother came first; at the first bite, they nodded encouragingly and noshed on it with espresso in hand. Next came Josh’s nephew, who took one bite and set his plate down. “That’s okay,” I told myself, “he’s only 11, he’s allowed to dislike these sorts of things.”

Then came Ruth. I handed her a plate and a fork and she cautiously picked at it before breaking off a piece and taking a bite. This only being the second time we’d met, I was anxious about giving a good impression about my baking skills.

At first, her expression was curious. Then, as if she’d taken a surprise bite of dirt, she quickly shuffled to the counter, grabbed a paper towel and spat the entire piece out. “No, no.” She said, shaking her head. “No, I can’t eat that, that’s much too bitter. I don’t like it.”

Only slightly mortified, I watched as Josh and his brother tried hide their laughter, and quickly apologized to Ruth, who was already grabbing a glass of water to wash the extra flavor away.

“Oh, god! I messed up!” I thought. Admittedly hurt, I shoved the torte away in the fridge in a hurry and watched as the rest of the family cut into a giant German Chocolate Cake we’d bought for Josh’s dad on the way up.

It only took me another 24 hours to learn that the delicate Southern palate is not always compatible with these non-traditional types of desserts. Josh reassured me later on, and helped me finish off the rest of the torte, which really wasn’t that bad for my first attempt at ever baking one.

With that in mind, I’d like to introduce this flourless torte recipe, but KEEP IN MIND: it’s rich, dense, dark chocolate. Pair it with a nice espresso or glass of almond milk for the best results. This recipe is adapted from a recipe I found on epicurious.com.

Flourless Chocolate Torte

Prep time: 15 minutes | Cook time: 25 minutes | Serves: Eight

Ingredients:

  • 4 ounces unsweetened baker’s chocolate or cacao
  • 1 stick (1/2 cup) unsalted  grass fed butter
  • 3/4 baker’s stevia
  • 3 large eggs
  • 1/2 cup unsweetened cocoa powder plus additional for sprinkling

Directions

  1. Preheat your oven to 375°F
  2. Grease an 8-inch round baking pan with the grass fed butter.
  3. Line the bottom of the pan with a round of wax paper; grease the wax paper with more butter.
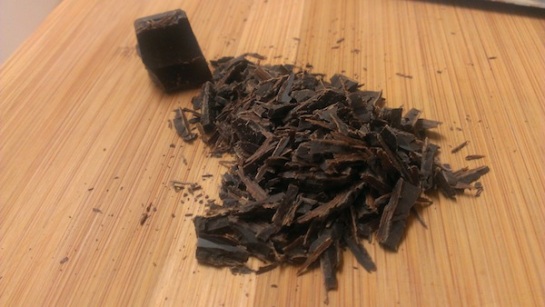
  4. Break the chocolate into small chunks.
  5. Melt the chocolate with the butter in a sauce pan double boiler with the water just barely simmering. Stir it until it’s smooth. Be careful not to burn the chocolate!
  6. Remove the pan from double boiler and whisk the stevia into chocolate mixture.
  7. Add the eggs and whisk them into the chocolate until fully incorporated.
  8. Pour 1/2 Cup of the cocoa powder into the melted chocolate mixture and mix until combined.
  9. Pour the batter into your wax-paper lined pan and bake in middle of oven 25 minutes.
  10. Dust the cake with additional cocoa powder or cinnamon and serve with espresso or fresh berries.
  11. Enjoy!

For the Love of All Things Coconut: Paleo Coconut Super Snacks

IMAG0781

If you’ve been eating paleo for any amount of time, you’ve probably come to either love or hate coconut. The paleo enthusiasts’ favorite little gem has a multitude of different uses, and is held in high regard for its many health benefits, stemming mainly from the high amount of lauric acid (good stuff) and medium-chain fatty acids that contribute to lower LDL levels, weight loss, skin health and heart health. You can smother it on your skin, add it to your coffee, use it as deodorant, drink it’s milk and sprinkle it over sweet treats to give that extra bit of love.

I, for one, love the stuff, and I try to find ways to incorporate it into my cooking whenever I can. Whether it be curried chicken or dark chocolate truffles rolled in toasted coconut shreds, I’m kind of in love with the stuff.

I hope you’re just as excited as I am, because today I’ve come up with something similar to those little chocolate truffles I made a while back, and they’re chock-full of coconut deliciousness. Get ready, today we’re making…

Paleo Coconut Super Snacks

Prep time: 5 minutes | Wait time: 2 hours | Serves: several

IMAG0780

Ingredients:

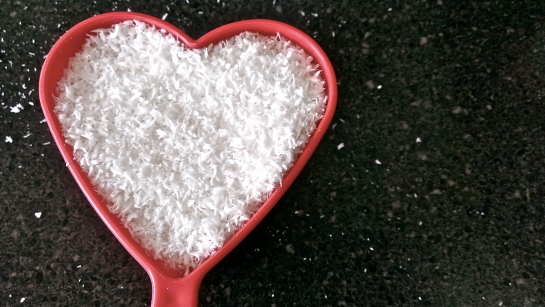
  • 1 1/3 C. shredded unsweetened coconut
  • 3 Tbsp regular, unsweetened coconut milk
  • 1/4 C. almond butter
  • 2 Tbsp. coconut oil
  • 2 Tbsp. Stevia in the Raw (baking quantities)

Directions:

  1. Mix the coconut milk and shredded together in a medium mixing bowl until you get a crumbly texture.
  2. Add the stevia to the coconut shreds and mix well. IMAG0783
  3. Put the almond butter and coconut oil in a microwave-safe bowl and heat them together in the microwave for 30 seconds. Remove, stir together well, then microwave once again for 30 seconds. Stir it one last time to make sure the oil and butter are completely incorporated.
  4. Mix the butter-oil combo with the shredded-coconut mixture.
  5. Put the mixture into the fridge for two hours.
  6. When the mixture is cold enough, roll it into separate bite-sized balls (Should yield roughly 16, depending on how large you’re rolling them.)
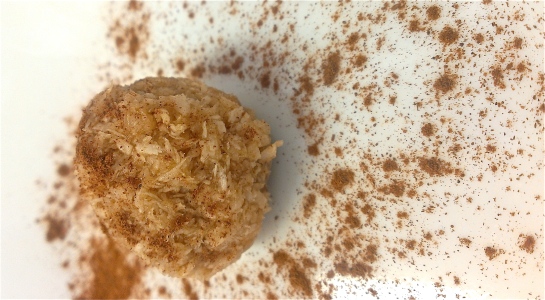
  7. Sprinkle with cinnamon and enjoy!

IMAG0786

Quick and Easy Flourless Brownies

IMAG0688

I think I may love sweets a bit too much sometimes.

Maybe it’s a seasonal thing, but these days, it’s hard to get through the week without cravings for some coconut truffles or almond vanilla cake. One of my biggest sweet-treat weaknesses has always been (and probably always will be) fluffy and moist brownies with big chunks of chocolate melted inside. You know the kind: it comes in a box, and you eat half the batter before it’s even had a chance to hit the oven. That’s the kind of brownie my heart yearns for, and that’s the kind of brownie I’ve dreamt of making.

In the past, I’ve always used ground flax meal or almond flour to give my baked goods depth and density, as well as a good amount of nutritional pop. However, those flour substitutes tend to suck up all the moisture in your batter and make things a little tough to swallow if you’re not careful with how the recipe is prepared. What was supposed to be a chewy brownie might come out more like a Clif bar.

So, for this round of chocolatey goodness, I decided to try a flourless brownie recipe using Stevia in the Raw as my sugar substitute (we’re sorely low on honey over here, and with this big winter storm coming through the front range, I don’t think I’ll be getting any for a few days). Rather than using any flour substitutes, I added a few more eggs and a bit less coconut milk.

What I got was a moist, spongy, rich chocolate brownie that makes for a perfect after-dinner treat, weighing in at only 60 calories per piece, with 4g fat, 3g protein, and 2g fibre (based on 12 servings).

Quick and Easy Flourless Brownies

Prep time: 5 minutes | Cook time: 15 minutes | Servings: 12

Ingredients

  • 4 eggs
  • 1/2 C. regular, unsweetened coconut milk
  • 2 tsp. pure vanilla extract
  • 3/4 C. Stevia in the Raw – baking quantities
  • 1/4 C. unsweetened cocoa powder (the darker the better)
  • 1/4 tsp salt
  • 1 tsp. baking powder
  • 3 Tbsp. unsweetened, toasted coconut shreds

Directions

  1. pre-heat oven to 350
  2. In a small bowl, whisk the eggs until they’re frothy, then add in the coconut milk and vanilla. Set aside.
  3. Mix the stevia, cocoa powder, salt and baking poweder in a medium-sized bowl.
  4. Pour the egg mixture into the dry ingredients, mix well.
  5. Grease a 12-section muffin tin with butter or coconut oil (make sure not to skip this step)
  6. Pour the batter evenly into the 12 sections. Top with the shredded coconut.
  7. Cook for 15-20 minutes
  8. Remove from pan and let rest on a cooling rack. Top with honey, cinnamon and homemade whipping cream.

Raising Them Paleo: An Intro to Paleo Parenting from Lizz of My Granola Home

file0001438816162My Husband and I have been gluten-free for 4+ years now, and grain-free for about 10 months. It’s definitely a hard transition from a SAD (Standard American Diet) to a gluten-free one, and an even bigger transition to grain-free. I’m not about to tell you I’m 100% Paleo/Primal. I’m not. I skate in around 60%. It is a big struggle breaking those emotional ties I have with illegal foods. It is ingrained (no pun intended!) in my mind, in my heart, and in my body. However, my convictions are strong enough that I’ve chosen to raise my daughter primal.

To embed this lifestyle in my daughter from infancy promises her a way better future than many of us will see. I was raised on a healthy diet, almost on par with The Weston A. Price Foundation. Unfortunately, I fell prey to the “health” advice circling around. I know that I wreaked havoc on my body, which I regret. I do not want the same for my daughter.

Here are a few things I’ve realized the past 10 months:

Raising your children Paleo will raise a lot of eyebrows. It’s a grain-laden world out there, and scary things can happen when you let your “grain guard” down. Some of the first foods they suggest for babies to try are grains. All snacks—from first finger foods to toddler foods—are grain-based. There is no escaping. Most people will think you are crazy for avoiding these foods, some may even mock you, but hold your ground. I remember once telling my mom that I feed Zoey eggs almost every day, and her response was, “She’s going to have high cholesterol before she’s 1!” Of course my mom was joking, but some people will say things like this and mean it. You can’t let it phase you.

Raising your children Paleo/Primal is time consuming. Almost all premade baby foods, snacks and toddler food contain grains or other unwanted ingredients. That means you’re making the food, which is way more effort than buying it. It takes time to plan their meals everyday, doing the shopping, and doing the cleaning (oh the cleaning!). Raising them Paleo is messy! When you give them cheerios, you can vacuum them up. Hunks of banana and avocado? Not so much! In order to be a successful Paleo parent you have to have convictions, otherwise you might just give up because of the work!

Raising your children Paleo is one of the best gifts you can give them. Not only are you nourishing them, you are cultivating a habit and a lifestyle to care for themselves.

Some things I recommend if you plan on raising your children Paleo:

  1. Know your facts. You will be bombarded with questions and concerns about the way you are feeding your children. Do you actually know what physically happens when you eat grains? Do you know the importance and reasons for eating fermented foods? Do you know why pastured animals are better for you? If you don’t know your facts, you’ll get run over.
  2. Hold your ground. You’ve got the facts, and you believe them. Don’t let people change your mind.
  3. Don’t sweat the small stuff. You can’t control every single bite of food that goes into your child’s mouth. There will be times they get an animal cookie or fishy cracker…it’s not a huge deal (unless they have allergies!!). Don’t fret, it won’t kill them.

I hope you find this encouraging. I know at times I’ve wanted to give up and just “go the easy route.” But I want to give her the best that I can and I want to set up my daughter to succeed. Don’t give up! I promise: you can raise them Paleo! Here are a few ideas I came up with to feed my baby to save you some of that precious time. She loved them all by the way!

Superpowers for Baby (9 months & up)

Ingredients:

  • 4 large, steamed carrots
  • 1/2 C steamed green beans
  • 1-2 Tbsp coconut oil or grass-fed butter
  • 1/2 tsp spirulina

Directions:

  1. steam the carrots and green beans
  2. reserve the water from steaming to thin out the baby food if needed
  3. put all ingredients in food processor or bullet until you reach desired consistency
  4. store for 3 days in fridge, or 1 month in freezer

Blueberry-Spinach-Pear Sauce (for around 7-8 months)

Ingredients:

  • 3-4 organic very ripe pears, peeled and cored
  • 1/4 C Frozen or Fresh, organic blueberries
  • handful of organic spinach
  • 1-2 Tablespoons organic, unrefined coconut oil
  • filtered water

Directions:

  1. Put all ingredients into a food processor and blend until semi-smooth, depending on age of the baby.
  2. Add more or less water depending on desired thickness.
  3. Will last 3 days in fridge, or a month in freezer

Green Beans & Pear (7 months and up)

Ingredients:

  • 3-4 very ripe organic pears, peeled and cored
  • 1/2 C organic green beans, steamed
  • 1-2 Tablespoons organic, unrefined coconut oil

Directions:

  1. reserve water from steamed green beans
  2. put all ingredients into a food processor or bullet and blend until desired texture, adding more water if needed
  3. store in fridge for up to 3 days, or freezer for up to a month

Power Green-Sweet Potato Mash (8 Months and Up)

Ingredients:

  • 2 medium organic sweet potatoes, baked until soft
  • Handful of organic spinach or power greens, such as kale or arugula
  • 1-2 Tablespoons grass-fed butter, or coconut oil if you want it dairy free

Directions:

  1. Blend all ingredients in food processor or bullet until semi-smooth
  2. add water if necessary
  3. store for up to 3 days in fridge, or up to a month in the freezer

My Granola Home

*This is a guest post written by Lizz of My Granola Home. Lizz writes about her explorations in granola living, granola parenting, raising a child paleo, and personal growth. You can find her at My Granola Home, on Twitter, and on Facebook

So Easy: Paleo-Style Finnish Pancakes

Paleo Finnish Pancakes

A few weeks ago, I wrote in with a new paleo almond flour pancake recipe that I was really excited about. After working through some research about baking soda, baking powder and the acidity of each ingredient, I managed to make the almond flour pancakes fluffy and delicious without shedding any tears of frustration in the process.

Today, I woke up once again with a hankering for some pancakes. Rather than re-doing what I’d previously accomplished, I wanted to figure out something new. I wanted to create a recipe that would follow traditional Finnish pancake style, an old favorite of mine from the pre-paleo days.

If you’ve never tried true Finnish pancakes before, think of the French crêpe—thin, made primarily of eggs, sugar and flour. Finnish pancakes are very similar to the French crêpe, and their appeal is that they’re extremely minimalistic and taste absolutely delicious. Before I started following the paleo lifestyle, I would make my own version of Finnish pancakes about three or four times a month. The only ingredients I used were eggs, flour, sugar, butter and salt. That’s where my challenge came in today: figure out how to make my beloved Finnish pancakes, paleo-style, without losing the authenticity of the original recipe.

Luckily, each of the original ingredients have simple and easily obtained substitutes. So, dear readers, I present to you:

Paleo-Style Finnish Pancakes

Prep time: 5 minutes | Cook time: 25 minutes | Serves: 2-4

You’ll need: a casserole dish, medium mixing bowl, a hand mixer

Ingredients:

  • 4 Tbsp. coconut oil, melted
  • 4 eggs
  • 1 13oz. can unsweetened coconut milk (full fat, not light!)
  • 2 Tbsp. softened honey or stevia equivalent
  • 1/2 C. almond flour
  • 1/2 tsp. salt or NoSalt substitute

Directions:

  1. Preheat your oven to 450 degrees.
  2. Take the melted coconut oil and pour it into the casserole dish—spread it around with a rubber spatula to make sure all edges are covered
  3. In a mixing bowl, beat the eggs until they’re fluffy and bubbly.
  4. Add the coconut milk, honey/stevia, almond flour and salt to the eggs. Mix well, until there are no chunks of almond meal remaining.
  5. Pour the batter into the casserole dish over the coconut oil.
  6. Cook for 25 minutes.

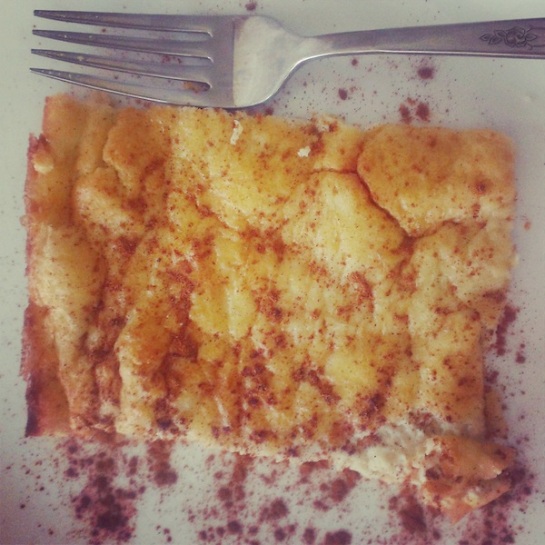
I used to eat mine with maple syrup and cinnamon—today, I topped them with homemade whipped cream, cinnamon and some sprinkles of hemp hearts.

Enjoy!

Bacon Wrapped Asparagus with Lemon Garlic Reduction

Asparagus

THIS POST BY MEGAN KELLY ORIGINALLY APPEARED ON THOUGHTCIRC.US ON FEBRUARY 28TH, 2013

I get sad whenever someone tells me that bacon is unhealthy and that I shouldn’t eat it.

Not because I agree with them and lament my choice to partake in its porky goodness, but because its supposed “bad qualities” overpower all the good things bacon has to offer. For instance, it’s delicious, and it can be used with just about anything (read: versatility).

Not only that, but bacon is also a power food. When you really think about it, bacon offers healthy (yes, healthy!) fats and a good amount of protein, causing some to assert that a hearty breakfast of bacon and eggs is actually better for you than one comprised of whole wheat toast and fruit. This is because it keeps you fuller for a longer period of time, and it doesn’t spike your insulin like a bagel would, which helps you avoid mid-morning (and mid-afternoon, and mid-evening) energy crashes.

Of course, if you’re like me, you tend to stray away from grains anyway, so this may not come as much of a surprise. But for those of you who claim to feel your arteries harden at the thought of eating fatty bacon, don’t panic; eating fat won’t kill you. In fact, it’s vital to your health, and avoiding fat can even cause mood disorders, like depression.

So why am I rambling about bacon and fat while sounding like a crazy person? Well, partially because I’m kind of obsessed with it, but also because I’ve got a really great recipe that I’d like to share with you, and I don’t want you to scoff at me when you see the alleged “health abomination” I’m about to place in front of you.

Bacon-Wrapped Asparagus in Garlic Lemon Reduction

Prep time: 10 minutes | Cook time: 1 hour | Serves: 2-4 people

Asparagus

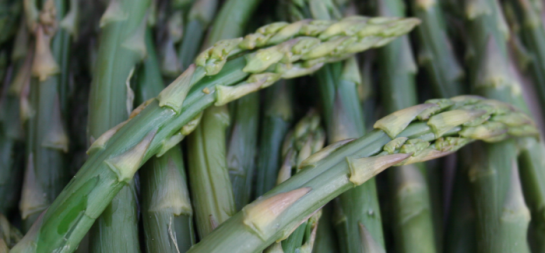
  • 1 large bundle (1lb) fresh asparagus
  • 8-10 slices bacon

Sauce

  • 1 Tbsp minced garlic
  • 1/2 tsp salt
  • 1/2 tsp freshly ground pepper
  • 1/4 C. butter
  • 1/2 C. chicken or vegetable broth
  • 2 Tbsp lemon juice

Directions

  • Preheat your oven to 325 F.
  • Wrap 4-5 pieces of asparagus with one piece of bacon apiece, from right below the tips down to the end of the stalk (don’t worry, bacon is stretchy). You may need to use more or less asparagus per bundle depending on the size of the stalks.
  • Place the bundles on a lightly greased pan, evenly spaced by about 1/2-inch, and put them in the oven for about 1 hour.
  • As the asparagus cooks,  grab a medium-sized sauce pan and melt the butter with the chicken stock and lemon juice over medium heat. Stir well to avoid any burned butter.
  • After the mixture comes to a soft boil, add the minced garlic, salt and ground pepper, and stir well.
  • Let the mixture reduce on medium-low heat (make sure it doesn’t go into a hard boil—keep it at a soft boil) for 40 minutes.
  • With 5 minutes left on the clock for the asparagus, remove them from the oven for a moment, drizzle the reduction lightly and evenly over the bundles, then put them back in the oven. Broil them on high for the last 3 minutes to get nice, crispy asparagus tips.
  • Serve hot as a side to any of your favorite “light” foods—grilled chicken breast, mixed greens, or baked white fish.

Now, go ahead and tell me that isn’t delicious.